用实际例子来学习 Docker
安装好 Vim 的 Ubuntu 镜像
Ubuntu 的 base 镜像默认是没有安装 Vim 软件的,现在来制作一个装好 Vim 软件的镜像
新建一个文件夹,比如 test
1 | mkdir test && cd test |
新建一个名为 Dockerfile 的文件,写入如下内容
1 | FROM ubuntu |
Dockerfile 中命令的含义是:
- 以 ubuntu 为 base 镜像
- 先执行
apt-get update命令更新软件源 - 然后再执行
apt-get install -y vim命令安装 vim(-y参数的意思是不询问直接安装软件)
编译 Dockerfile,把新镜像命名为 ubuntu-vi
1 | docker build -t ubuntu-vi . |
执行 docker images 就能看到一个名为 ubuntu-vi 的镜像了
第一个 Docker 化的 Java 应用
JPress 是 Java 版的 WordPress。现在使用 Docker 来构建一个 JPress 的应用
过程如下:
- 使用 Tomcat 的镜像,把 JPress 的 WAR 包打包进去
- 再启动一个 MySQL 的 Docker 容器
- JPress 应用连接 MySQL
配置阿里云安全组规则
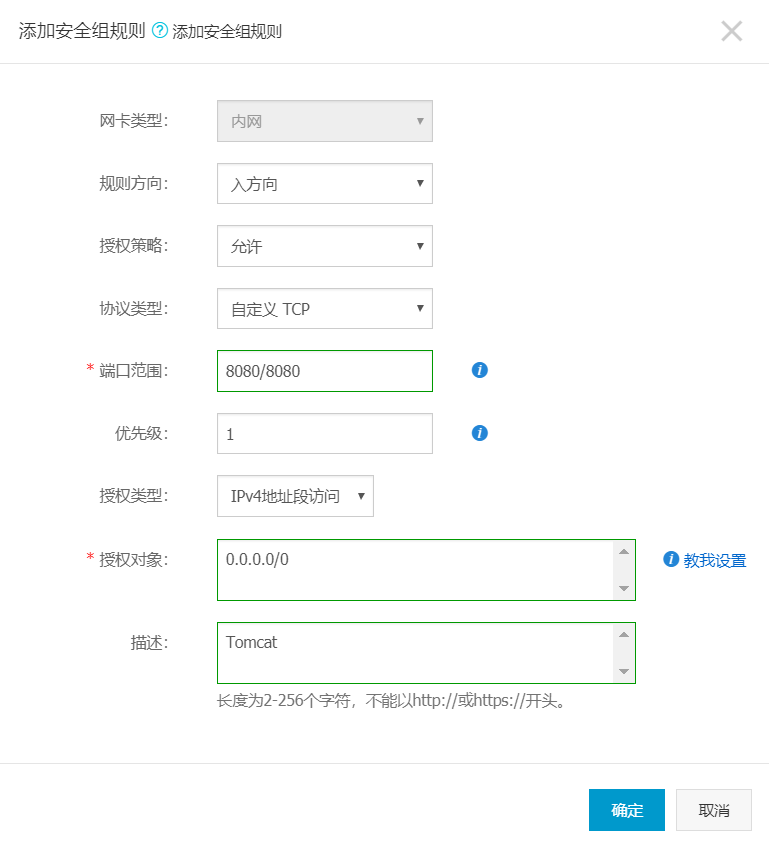
阿里云默认只允许 22 端口连接,如果还需要其他端口的话,需要配置一下安全组规则。这里需要配置一下 Tomcat 的 8080 端口和 MySQL 3306 端口
8080 端口
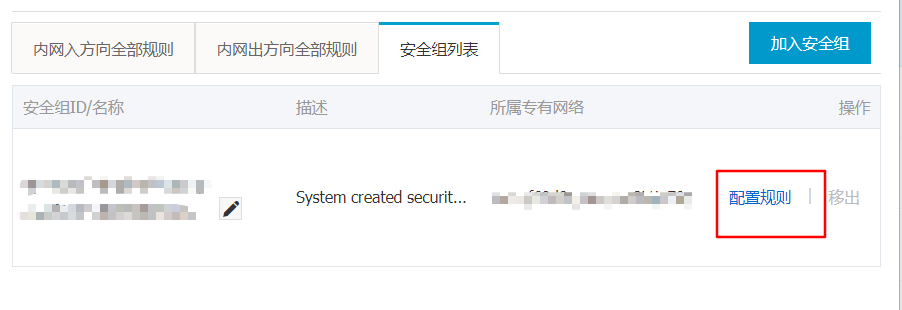
在实例列表中,选择“更多 - 安全组配置”

选择“配置规则”
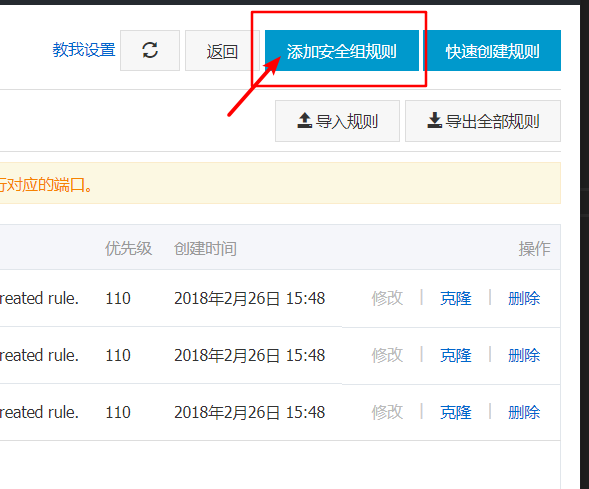
点击右上角的“添加安全组规则”
按照如下图设置,允许外网访问 8080 端口
对于“规则方向”,文档 里有讲:
- 出方向:是指 ECS 实例访问内网中其他 ECS 实例或者公网上的资源。(也就是主机到外网)
- 入方向:是指内网中的其他 ECS 实例或公网上的资源访问 ECS 实例。(即外网到主机)
3306 端口
按照下图设置
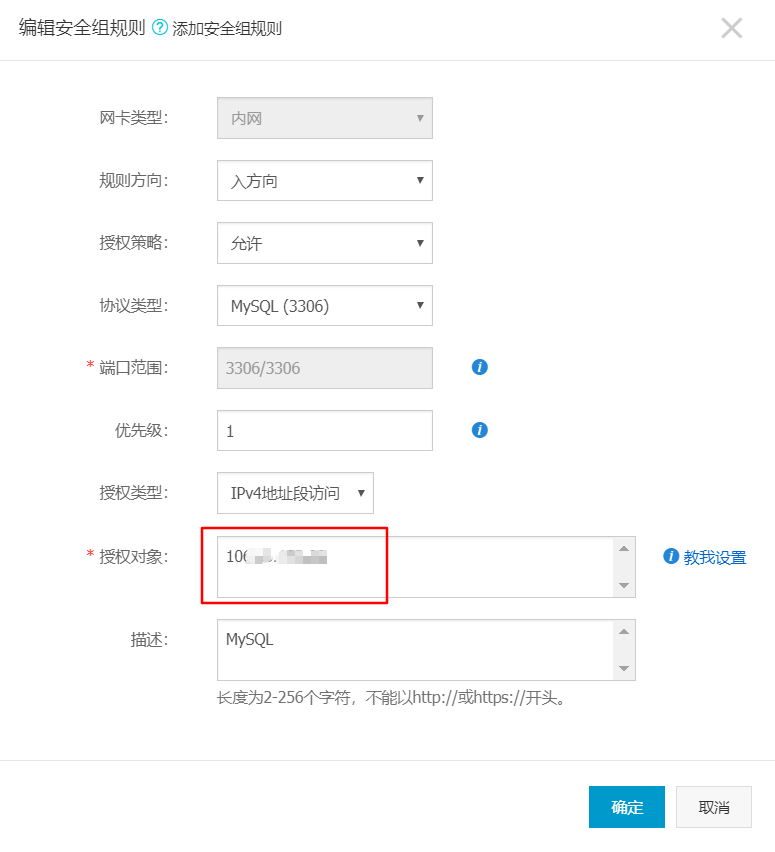
需要注意的是,我只允许本机可以访问 MySQL,所以把“授权对象”填写成自己的外网 IP
构建 JPress 镜像
新建一个文件夹,然后下载 JPress 的 WAR 包,改名为 jpress.war
1 | mkdir jpress |
创建一个 Dockerfile 文本文件,然后写入如下信息。tomcat 镜像的配置,可以看官网
1 | # 使用 tomcat 作为基础镜像 |
构建镜像,镜像的名字指定为 jpress:latest
1 | docker build -t jpress:latest . |
输入 docker image ls jpress 就可以看到创建好的 jpress 镜像了
1 | root@iZ94fg0bhwgrgtZ:~/docker# docker image ls jpress |
启动 JPress 镜像
1 | docker run -d -p 8080:8080 jpress |
-d 表示容器后台启动,-p 8080:8080 表示宿主机的 8080 端口访问容器的 8080 端口。TAG 默认是 latest,所以不写也行
使用 netstat -na | grep <port> 可以查看宿主机的端口监听状态。使用 docker ps 也可以看到目前启动的容器相关信息
启动 MySQL 容器
mysql 镜像的使用方法,可以看官网
1 | docker run -d -p 3306:3306 -e MYSQL_ROOT_PASSWORD=123456 -e MYSQL_DATABASE=jpress mysql:5.7 |
-d 后台启动。-p 3306:3306 宿主机的 3306 端口连接容器的 3306 端口。-e MYSQL_ROOT_PASSWORD=123456 指定环境变量 MYSQL_ROOT_PASSWORD 的值,这里是指定 ROOT 密码为 123456。-e MYSQL_DATABASE=jpress 指定环境变量 MYSQL_DATABASE 的值,这里是默认创建一个名为 jpress 的数据库
使用 JPress
根据本机的 IP 访问 JPress,比如是 http://123.123.123.123/jpress,就可以看到界面了
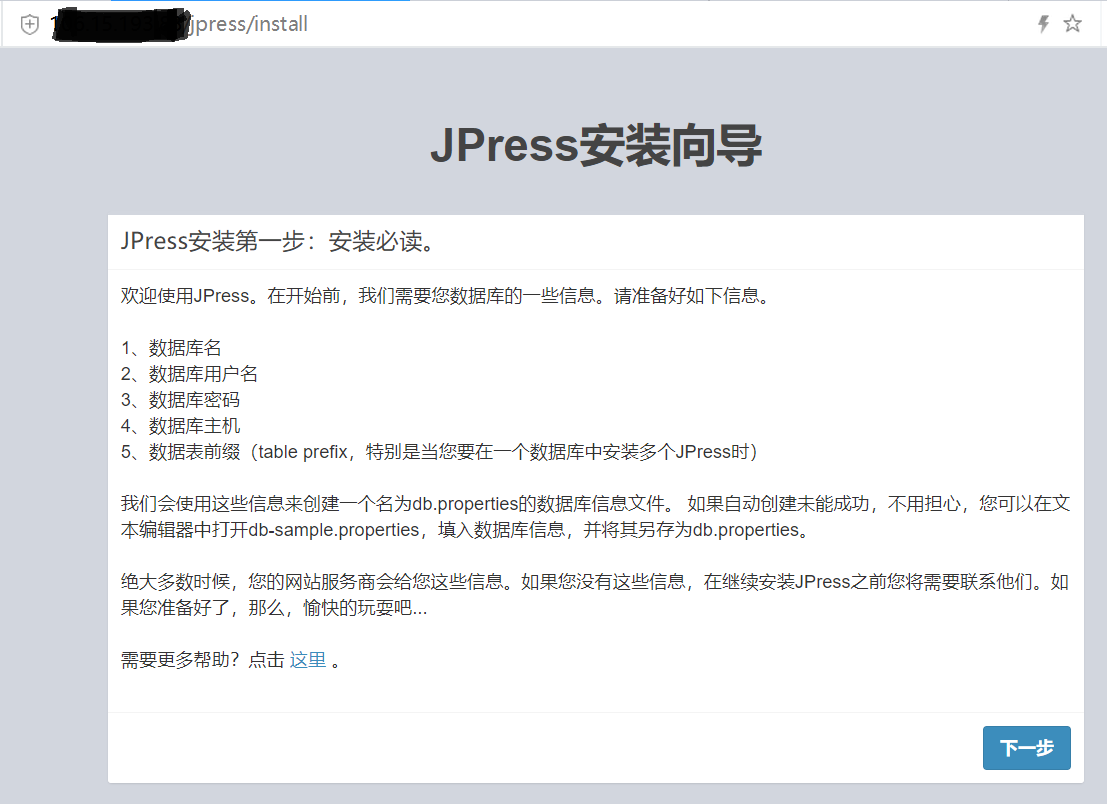
按照提示一步一步操作即可。在连接 MySQL 时,注意一下 IP,不要写成 localhost 了,因为这里的 localhost 是只 JPress 容器自己的 localhost,而不是宿主机的 localhost
JPress 安装完成之后,执行 docker restart <containerId> 重启容器
创建一个 Java + Tomcat 镜像
下载 JDK 和 Tomcat
新建一个文件夹,比如 test
1 | mkdir test |
下载 JDK 并解压,得到一个名为 jdk1.8.0_201 的文件夹
1 | wget --no-cookies --header "Cookie: oraclelicense=accept-securebackup-cookie" https://download.oracle.com/otn-pub/java/jdk/8u201-b09/42970487e3af4f5aa5bca3f542482c60/jdk-8u201-linux-x64.tar.gz |
下载 Tomcat 并解压,得到一个名为 apache-tomcat-8.5.38 的文件夹
1 | wget http://mirrors.hust.edu.cn/apache/tomcat/tomcat-8/v8.5.38/bin/apache-tomcat-8.5.38.tar.gz |
编写 Dockerfile
1 | # 以 ubuntu:16.04 为基础镜像 |
构建
1 | docker build -t ikutarian/tomcat:1.0 . |
启动
1 | docker run -d -p 8080:8080 ikutarian/tomcat:1.0 |
浏览器访问 <宿主机ip>:8080 即可看到界面了
一个使用阿里软件源的 Ubuntu 镜像
新建一个文件夹比如 new_ubuntu
准备好一个 Ubuntu 16.04 的阿里云源文件 sources.list, 内容为
1 | # 默认注释了源码镜像以提高 apt update 速度,如有需要可自行取消注释 |
阿里云软件源如何配置可以看这篇文章:《ubuntu软件源》
然后创建一个 Dockerfile 文件,填入以下内容
1 | # 以 ubuntu:16.04 为基础镜像 |
然后是构建
1 | docker build -t ikutarian/new_ubuntu . |
自己创建一个 Nginx 镜像
新建一个文件夹,比如 static_web,然后创建一个 Dockerfile 文件,填入如下内容
1 | # 以 ikutarian/new_ubuntu 为基础镜像 |
构建
1 | docker build -t ikutarian/static_web . |
启动容器
1 | docker run -d -p 80:80 ikutarian/static_web |
访问宿主机的 IP 就能看到 Nginx 的页面了
一个体积很小的 Docker 镜像
官方的 hello-world 镜像才 1.84KB,算是很小了。我也试试看能不能创建一个体积很小的 Docker 镜像
1 | REPOSITORY TAG IMAGE ID CREATED SIZE |
首先创建一个文件夹 hello,然后在文件夹中新建一个 hello.c,填入以下内容
1 |
|
然后编译 hello.c,生成可执行文件 hello
1 | gcc hello.c -o hello |
运行可执行文件 hello
1 | ./hello |
就可以输出内容
1 | Hello, World |
编写 Dockerfile,填入如下内容
1 | # 使用空白镜像 |
构建镜像,取名为 ikutarian/hello
1 | docker build -t ikutarian/hello . |
查看刚刚构建好的镜像,可以看到体积为 10.6KB,算是很小了
1 | docker images |
现在运行一下
1 | docker run --rm ikutarian/hello |
却发现报错了
1 | standard_init_linux.go:190: exec user process caused "no such file or directory" |
由于刚刚我们编译 hello.c 的时候,采用的是动态链接,gcc 帮我们默认链接了库文件,而 ikutarian/hello 中只有根目录下一个 hello 文件,并没有这些库文件,所以容器中的 hello 肯定运行不起来。使用 ldd hello 命令查看 hello 链接了哪些库文件
1 | /lib/ld-musl-x86_64.so.1 (0x7f12fcfc8000) |
这次我们采用静态编译的方式编译 hello.c
1 | gcc -static hello.c -o hello |
重新构建镜像,现在的镜像大小是 82.7kB,因为加入了库文件,所以镜像变大了
1 | REPOSITORY TAG IMAGE ID CREATED SIZE |
不过现在重新运行镜像,没有问题,可以输出 Hello, World。不过和官方的 hello-world 镜像比起来,我的 ikutarian/hello 镜像体积太大了。到 Github 上 hello-world 的仓库]查看一下
Dockerfile 如下
1 | FROM scratch |
hello.c 如下
1 | //#include <unistd.h> |
Dockerfile 和我的是一样的,之所以 hello-world 之所以这么小,就是因为在 hello.c 上做的文章。C 语言我不熟,研究就到此为止吧
一个 Python 的 flask 框架 demo
新建一个文件夹 flask
1 | mkdir flask |
新建 app.py 文件,写入如下代码
1 | from flask import Flask |
新建一个 Dockerfile
1 | # 以 python:2.7 为基础镜像 |
构建镜像
1 | docker build -t ikutarian/flask-hello . |
运行容器
1 | docker run -p 5000:5000 -d ikutarian/flask-hello |
浏览器访问 http://宿主机ip:5000 即可看到 hello world 返回
搭建本地 Python Flask 开发环境
新建一个文件夹 flask_dev
1 | mkdir flask_dev |
新建 app.py 文件,写入如下代码
1 | from flask import Flask |
Dockerfile
1 | # 以 python:2.7 为基础镜像 |
运行容器,同时把当前路径挂载到 /app/ 文件夹,并且指定 python 文件
1 | docker run -d -p 5000:5000 -v $(pwd):/app/ ikutarian/pyton_dev app.py |
浏览器访问 http://宿主机ip:5000 即可看到 hello world 返回
stress镜像
新建文件夹 stress,然后在里面新建一个 Dockerfile
1 | FROM ikutarian/aliyun_ubuntu |
构建镜像
1 | docker build -t ikutarian/stress . |
注意 Dockerfile 中 ENTRYPOINT 和 CMD 都有,说明以下方式调用都可以
1 | docker run -it ikutarian/stress |
具体原因看这篇文章:《Docker中RUN、CMD和ENTRYPOINT的区别》
Hexo
1 | # 指定基础镜像,为了减少大小,采用了 alpine 镜像 |
https://neue.v2ex.com/t/279518#reply2
https://hub.docker.com/search?q=hexo&type=image
Docker 部署 SpringBoot 项目
https://spring.io/blog/2018/11/08/spring-boot-in-a-container